而這個應用需要用到 ListBox 中的 RemoveAt、Insert、SelectedIndex 這三個屬性
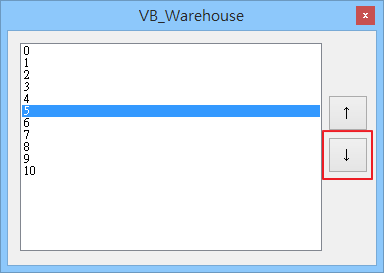
首先我們在 ListBox 中加入 0~10 的資料,並選擇 5
點選右邊的 Buttom 「↑」

這樣就可以看到數字 5 已經跑到 4 上面了

而按↓的話會跑到數字 6 的後面

這樣一來就可以實現讓資料上下移動的效果
    Private Sub Form1_Load(ByVal sender As System.Object, ByVal e As System.EventArgs) Handles MyBase.Load
        Dim i As Single
        For i = 0 To 10
            ListBox1.Items.Add(i)
        Next
    End Sub

    Private Sub Button1_Click(ByVal sender As System.Object, ByVal e As System.EventArgs) Handles Button1.Click
        Dim list As String
        Dim h As Single
        h = ListBox1.SelectedIndex
        list = ListBox1.Text

        ListBox1.Items.RemoveAt(h)
        ListBox1.Items.Insert(h - 1, list)
        ListBox1.SelectedIndex = (h - 1)
    End Sub

    Private Sub Button2_Click(ByVal sender As System.Object, ByVal e As System.EventArgs) Handles Button2.Click
        Dim list As String
        Dim h As Single
        h = ListBox1.SelectedIndex
        list = ListBox1.Text

        ListBox1.Items.RemoveAt(h)
        ListBox1.Items.Insert(h + 1, list)
        ListBox1.SelectedIndex = (h + 1)
    End Sub
一、Form1_Load 是用 For 來加入 0~10 進去 ListBox
二、Button1_Click:「↑」
三、Button2_Click:「↓」
四、移動的主要方法是先把資料和點選位置儲存到 list 和 h 中
在移除選取的項目,之後再移動,最後選取移動後的項目。
[物件] ListBox
沒有留言:
張貼留言